This is the last part of the series and in here I am going to demonstrate how to install and configure AD RMS.
Setup AD RMS Root Cluster
AD RMS only can install in Domain Member Server. I have a demo server setup and its already member server of the domain. First AD RMS server add to the forest creates the AD RMS cluster.
Install AD RMS Role
1) Log in to the server as Enterprise Administrator.
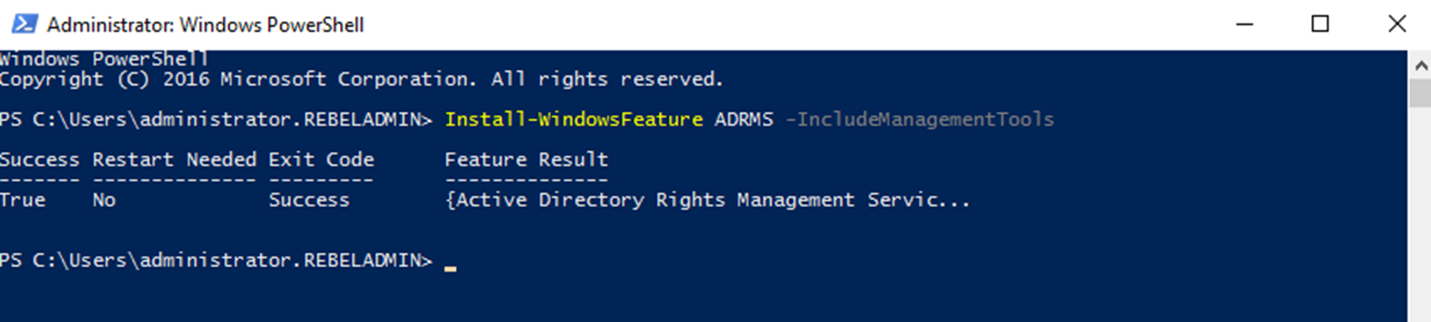
2) Install the AD RMS role and related management tools using,
Install-WindowsFeature ADRMS -IncludeManagementTools
Configure AD RMS Role
1) Launch Server Manager > Notifications > Under “Configuration required for Active Directory Rights Management Services” > Perform Additional Configuration. This will open the AD RMS Configuration Wizard. Click Next to start the configuration.
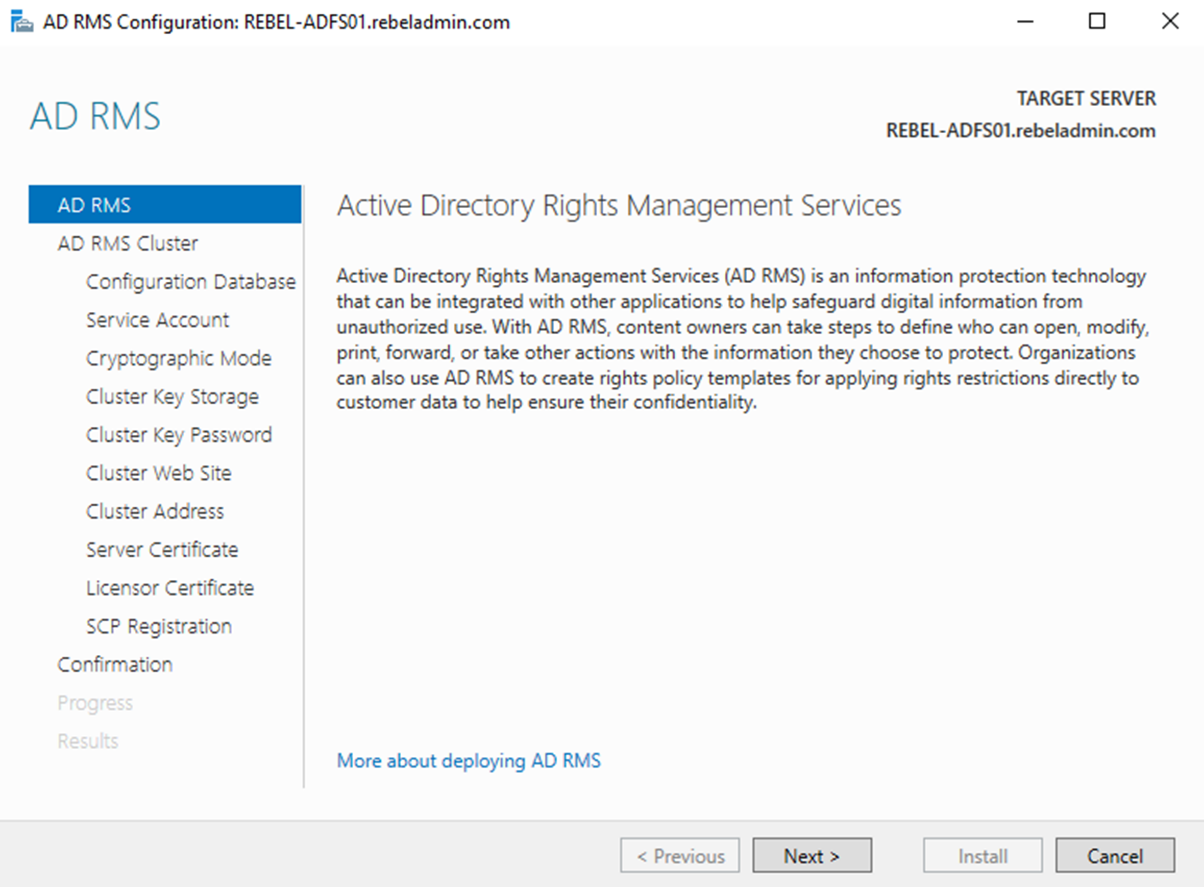
2) In next screen, it gives option to create new AD RMS root cluster or join it to existing AD RMS cluster. Since it is new cluster, select option Create a new AD RMS root cluster and click Next.
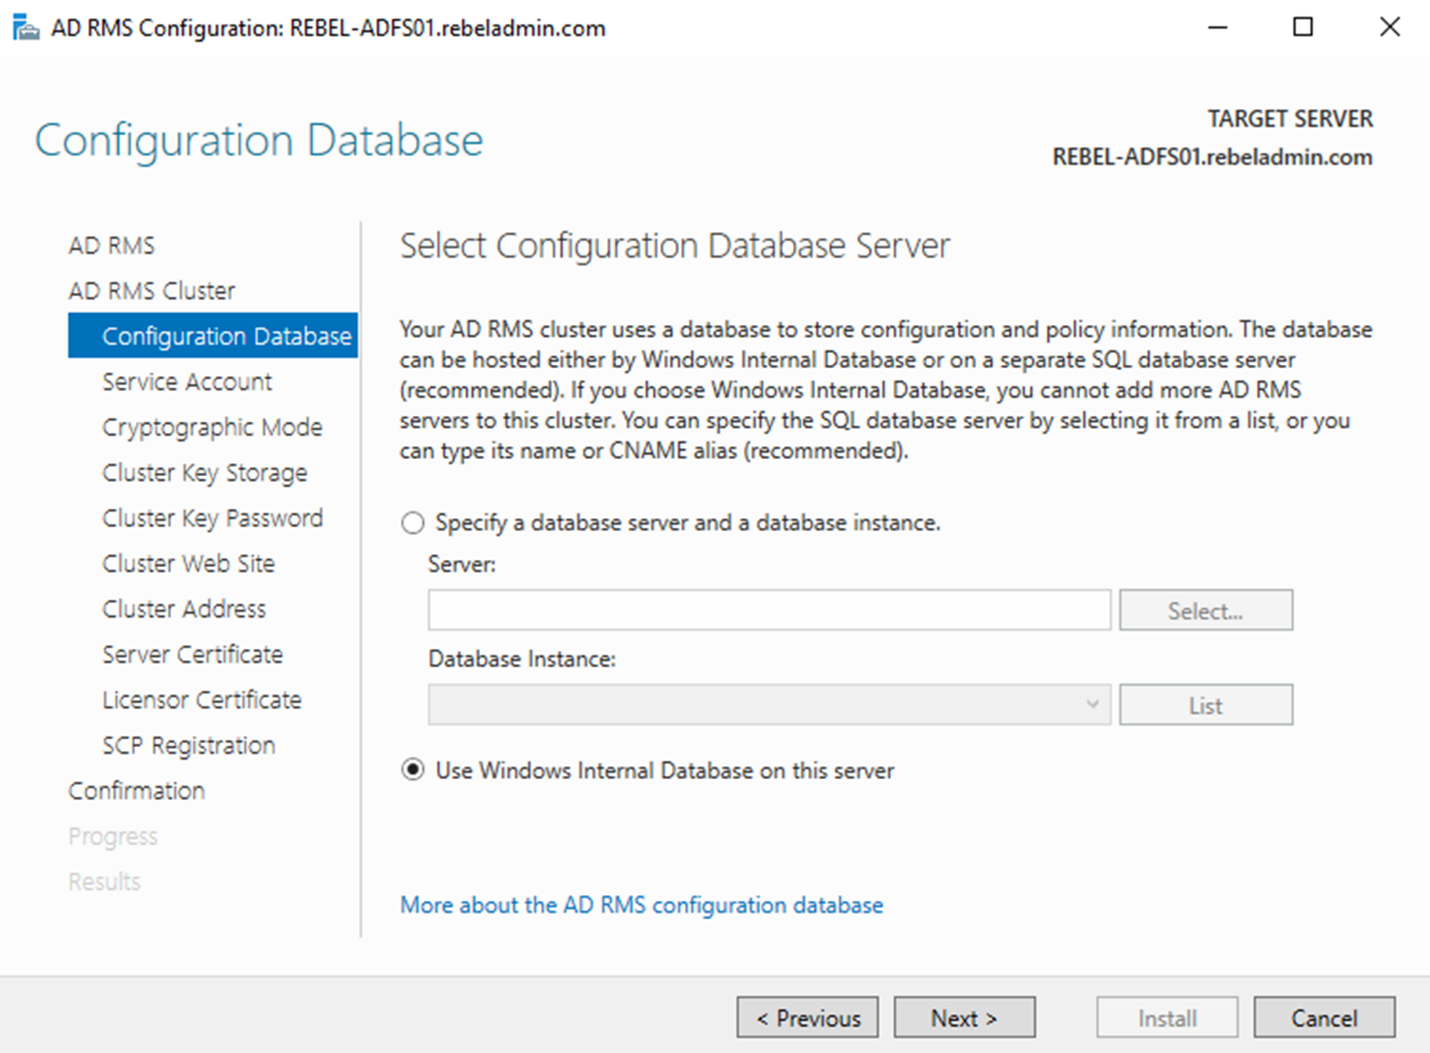
3) Next Screen is to define the AD RMS database configuration. If it’s going to use MS SQL server need to specify the Database server and the instance. Or else it can use Windows Internal Database. Please note if WID used, it cannot have any more AD RMS servers and cannot have AD RMS mobile extension either. Since its demo, I am going to use WID. Once selection made, click Next to move to next step.
4) In Next window, we need to define service account. It is used to communicate with other services and computers. This doesn’t need to have Domain or Enterprise Admin rights. Click on Specify and provide the user name and password for the account. Then click Next to Proceed to next window.

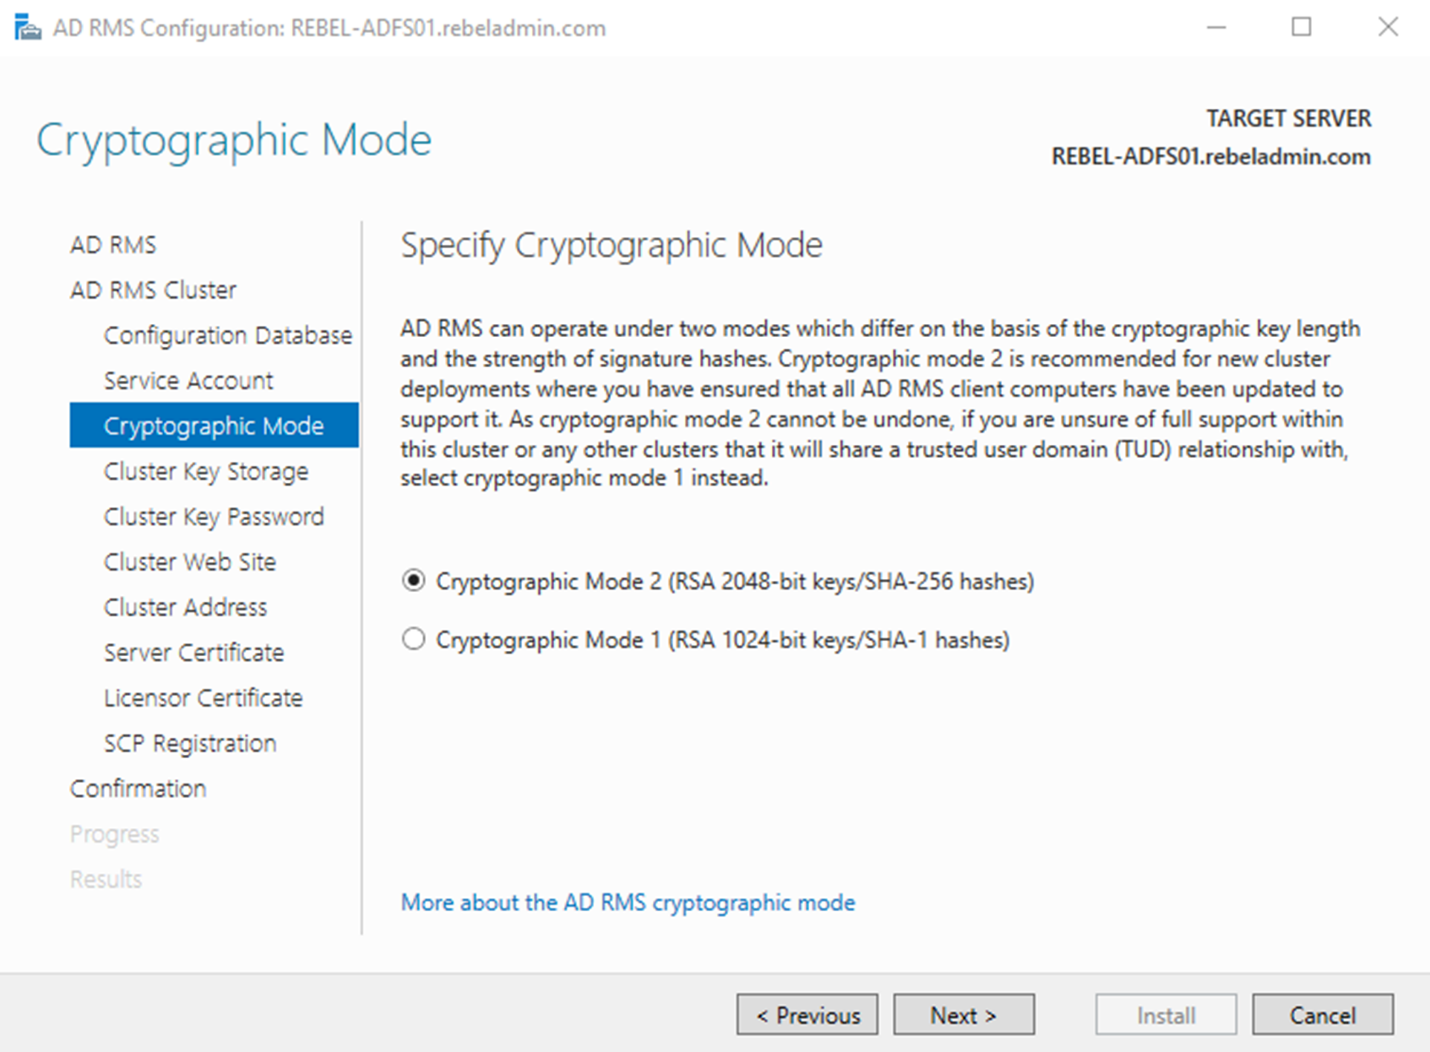
5) In next windows, we need to select the Cryptographic mode. This defines the strength of the hashes. This is support two mode which is SHA-1 and SHA-256. It is highly recommended to use Mode 2 which is SHA-256 for stronger hashing. However, this need to be match with the other RMS cluster it deals with. In our setup, I am going to use default SHA-256. Once Selection is made click next to proceed.
6) AD RMS uses cluster key to sign the certificate and licenses it issues. This is also required when AD RMS restore or when new AD RMS server add to the same cluster. It can be saved in two places. Default method is to use AD RMS centrally managed key storage. So, it doesn’t need any additional configurations. It also supports to use cryptographic service provider (CSP) as storage. But this required manual distribution of key when add another AD RMS server to the cluster. In this we will use option “Use AD RMS centrally managed key storage”. Once selection is made click Next to proceed.
7) AD RMS also uses Password to encrypt the cluster key described in above. This is required to provide when add another AD RMS server to cluster or when restore AD RMS from backup. This key is cannot reset. There for recommended to keep it recorded in secure place. Once define the AD RMS Cluster Key Password, click Next to proceed.
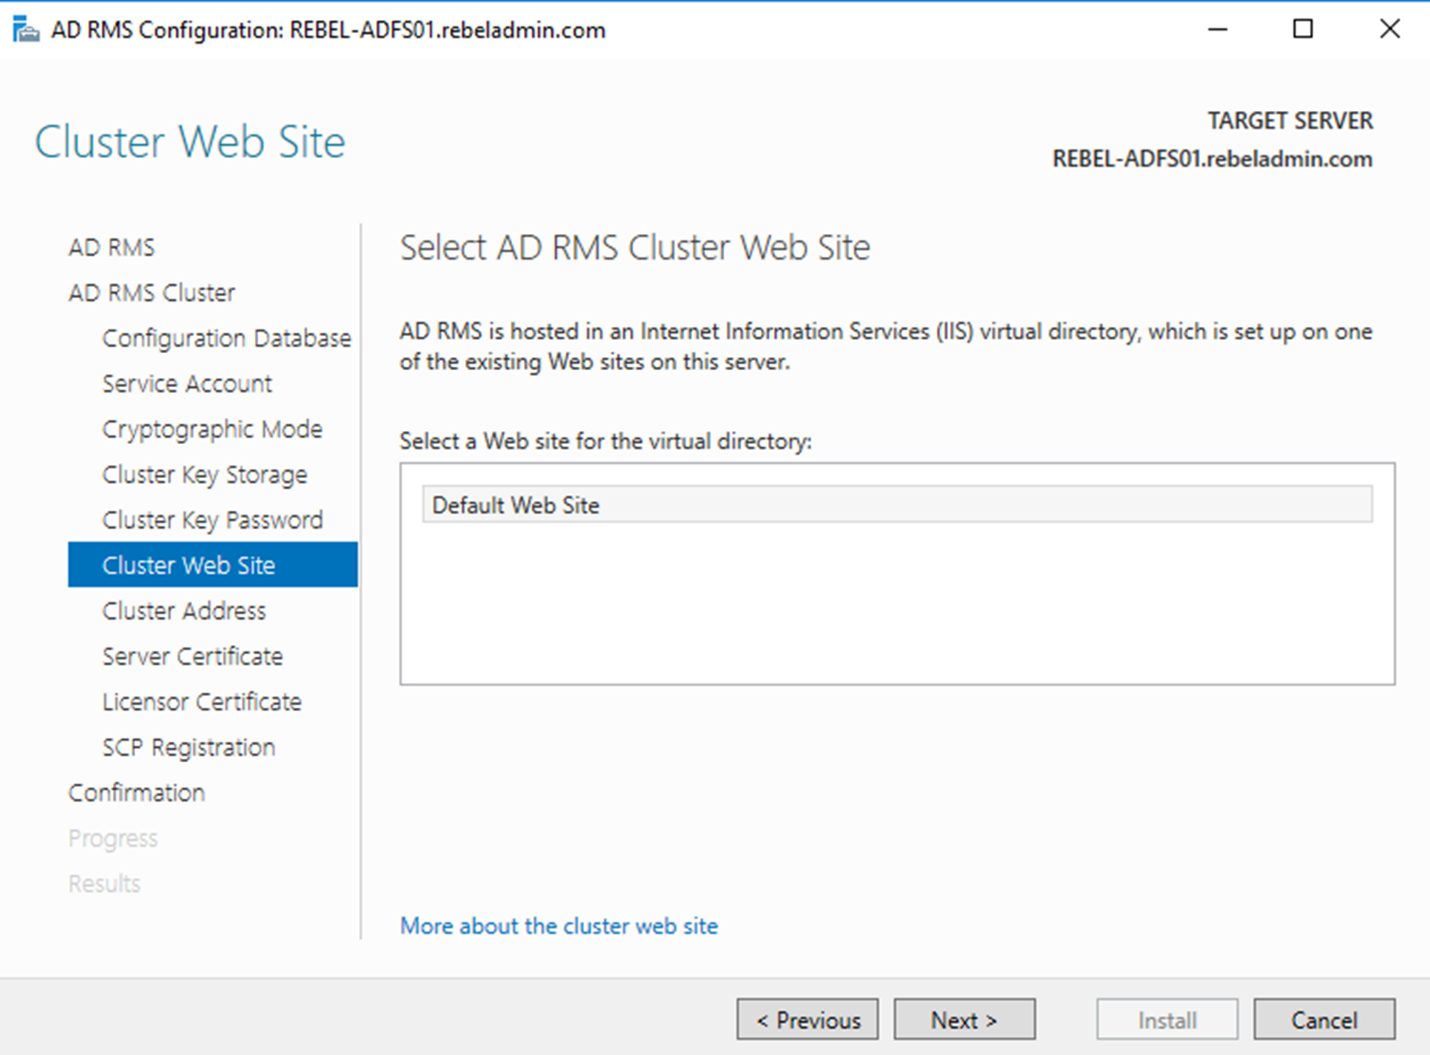
8) In next window, we need to define the IIS virtual directory for the AD RMS web site. Unless there is specific requirement always use the default and click Next.
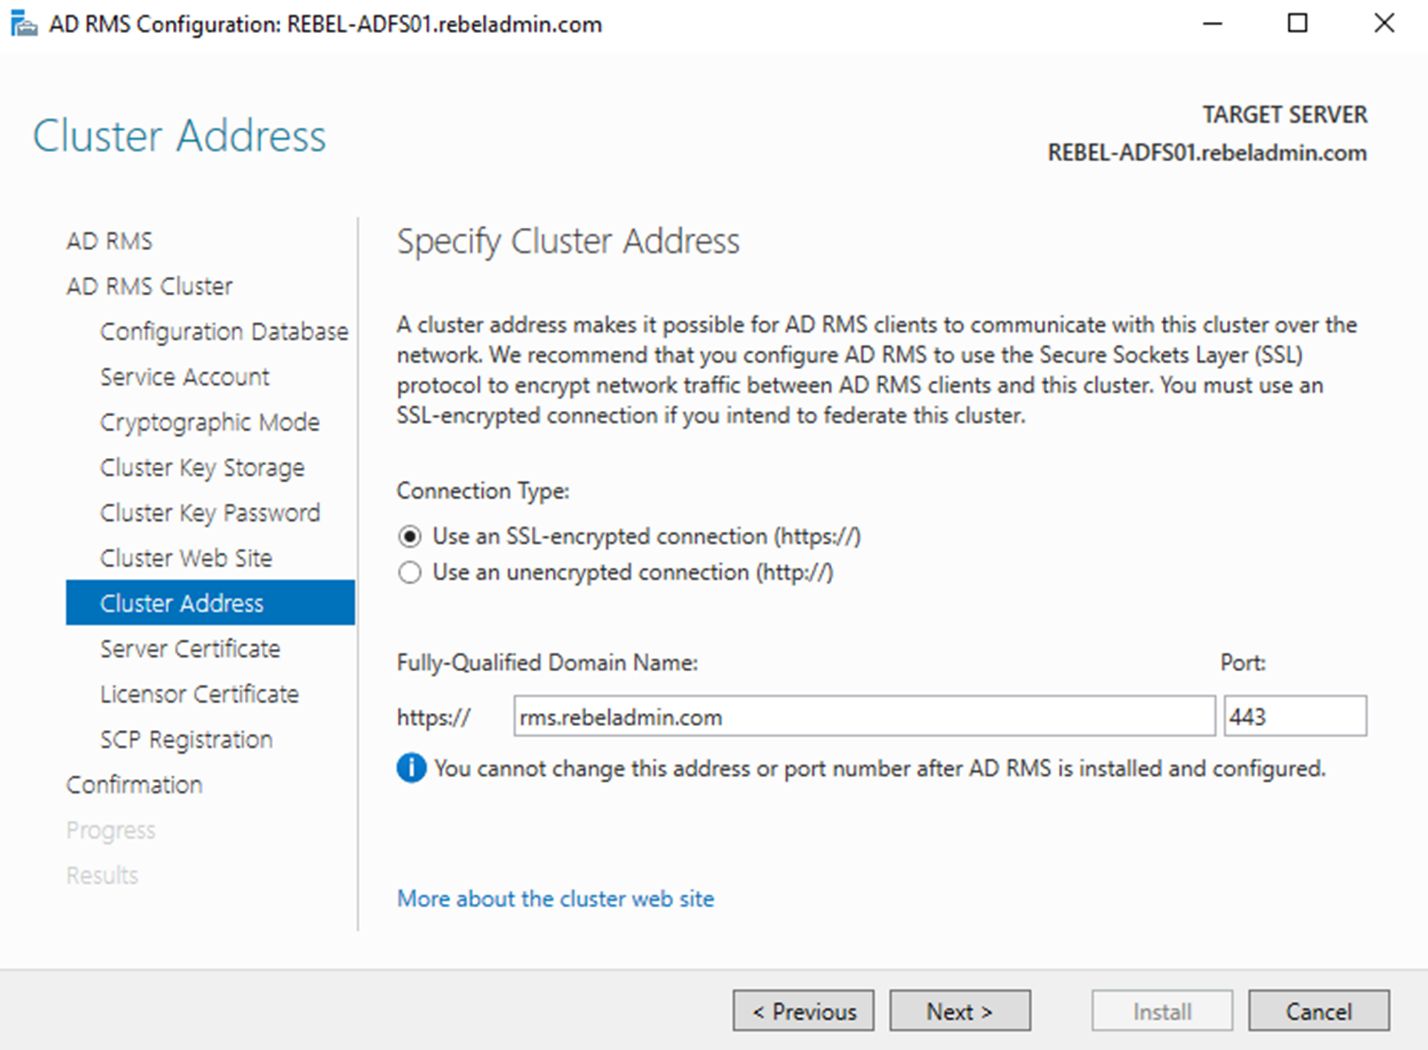
9) In next step, we need to define a AD RMS cluster URL. This will use by AD RMS clients to communicate with AD RMS cluster. It is highly recommended to use SSL for this even its allow to use it with HTTP only method. The related DNS records and Firewall rules need to be adjusted in order to provide connection between AD RMS clients and this URL (Internally or Externally). Once configuration values provided, click Next to proceed. One thing need to noted is, once this URL is specified, it cannot be change. In this demo, the RMS URL is https://rms.rebeladmin.com.
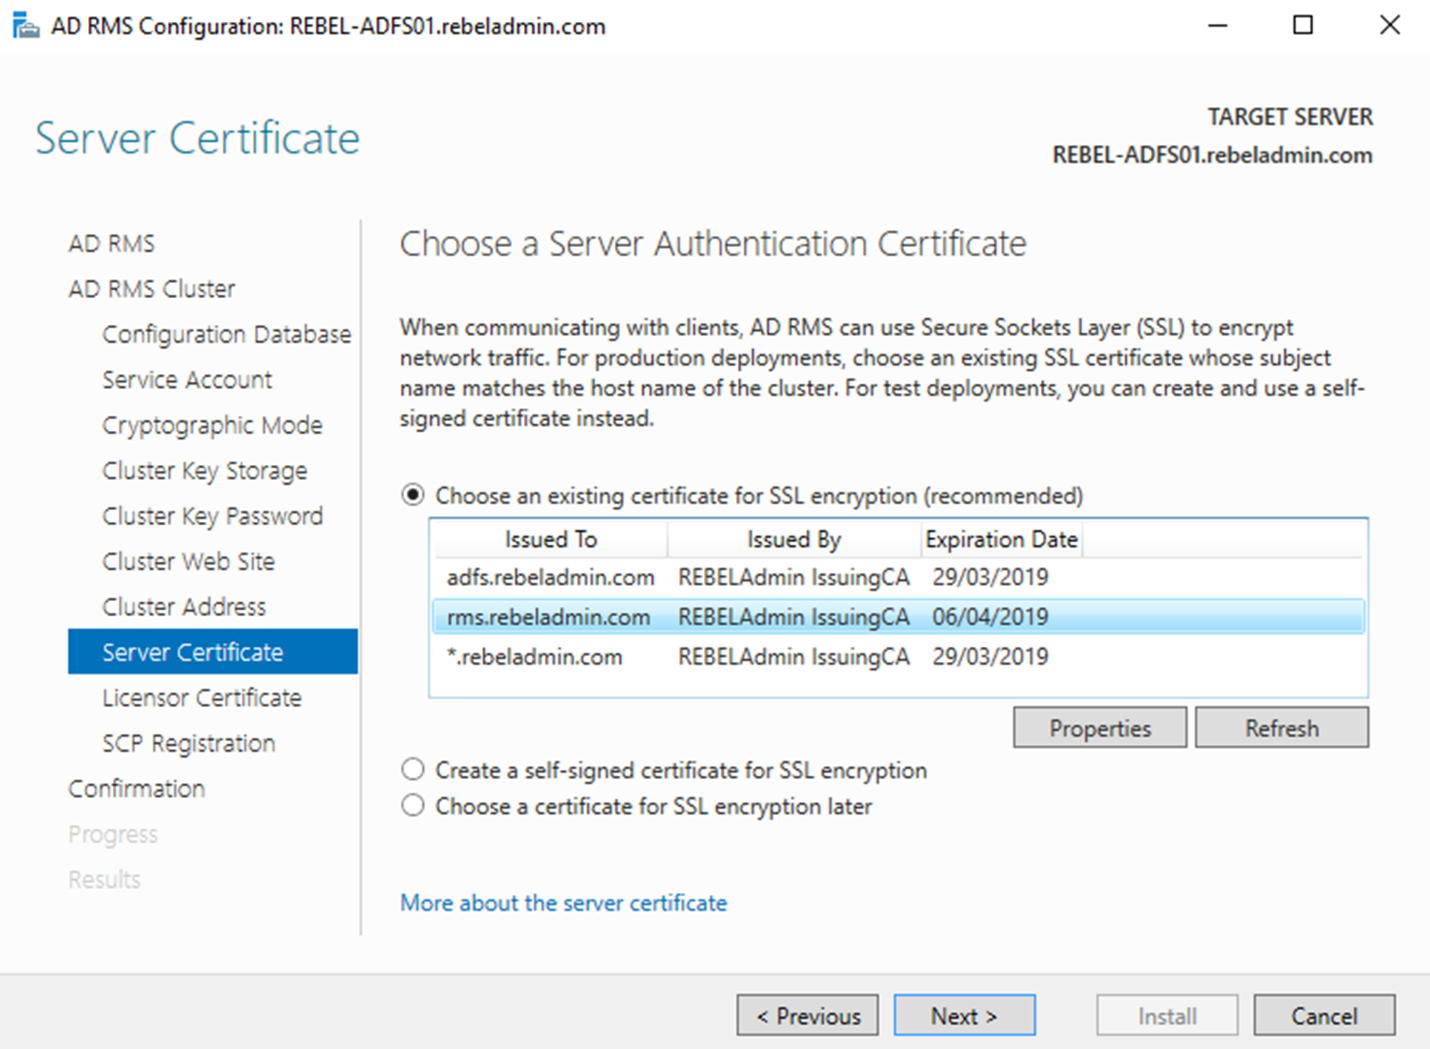
10) In next step, we need to define Server Authentication Certificate. This certificate will use to encrypt the network traffic between RMS clients and AD RMS cluster. For testing it can use self-signed certificate but not recommended for production. If its uses internal CA, client computers should be aware of the root certificate. In wizard, it automatically takes the list of SSL certificates installed in the Computer and we can select the certificate from there. It also allowed to configure this setting in later time. Once settings are defined, click Next to proceed.
11) In next window, it asks to provide Name for the Server License Certificate (SLC). This certificate is to define the identity of the AD RMS cluster and it used in the Data protection process between clients to encrypt/decrypt symmetric keys. Once defined a meaningful name, click Next to proceed.
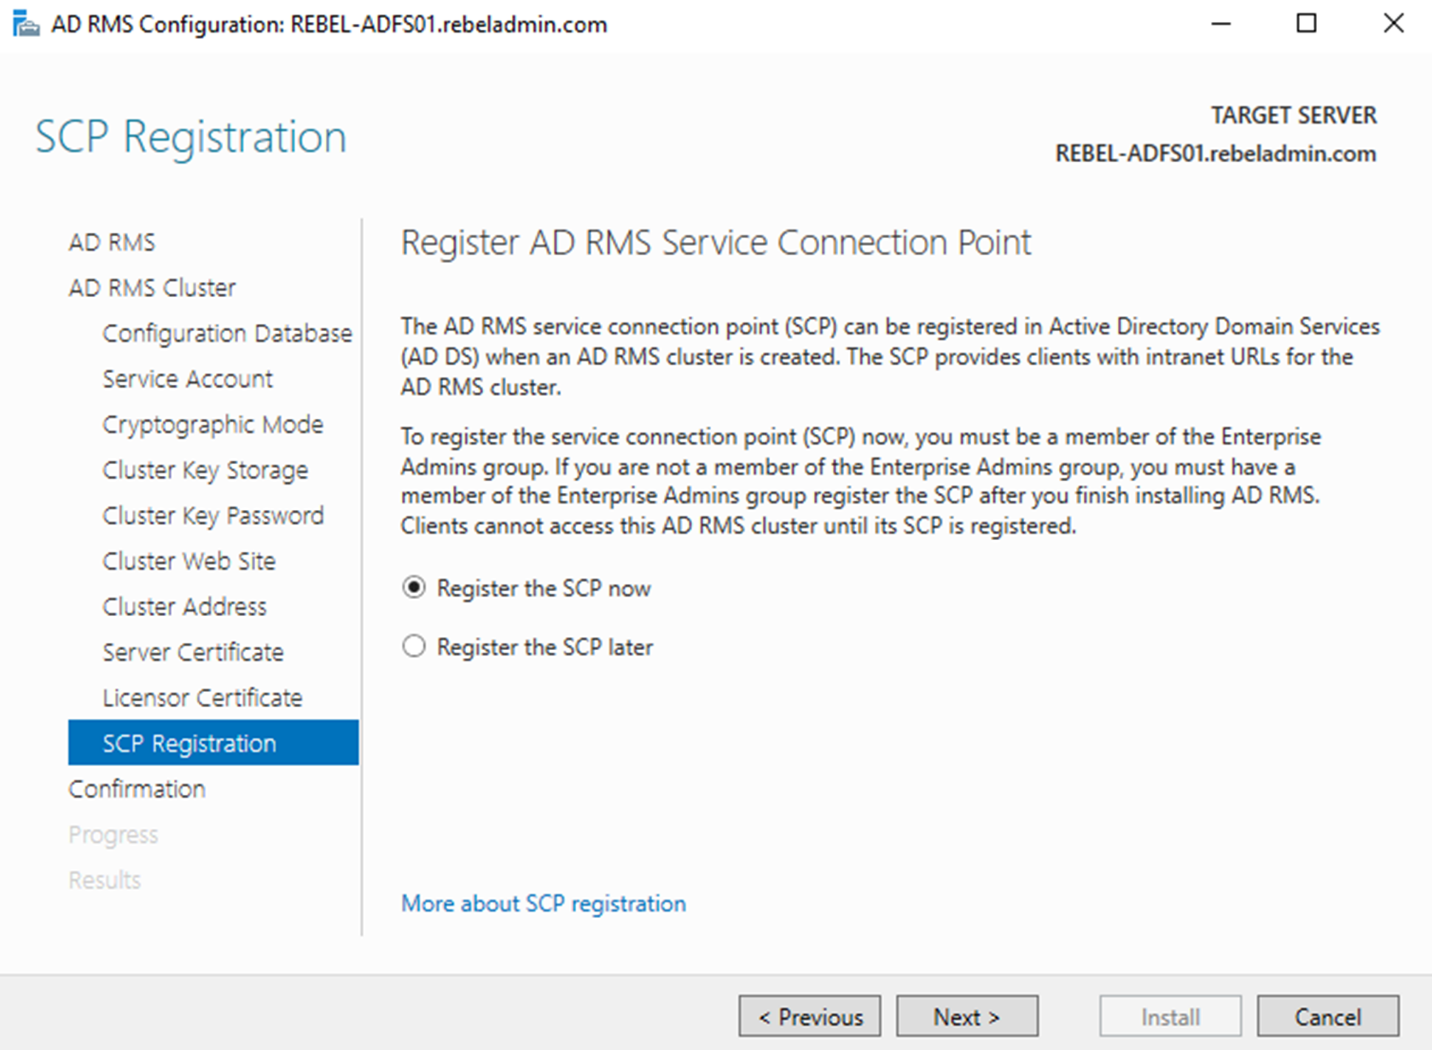
12) Last step of the configuration is to register AD RMS connection service point (SCP) with the AD DS. If needed this can configure later too. This need enterprise administrator privileges to register it with AD DS. In this demo, I already logged as enterprise administrator so I am using “Register the SCP now”. Once option selected, click Next.
13) After the confirmation, installation will begin and wait for the result. If it’s all successful, log off and log back in the AD RMS server.
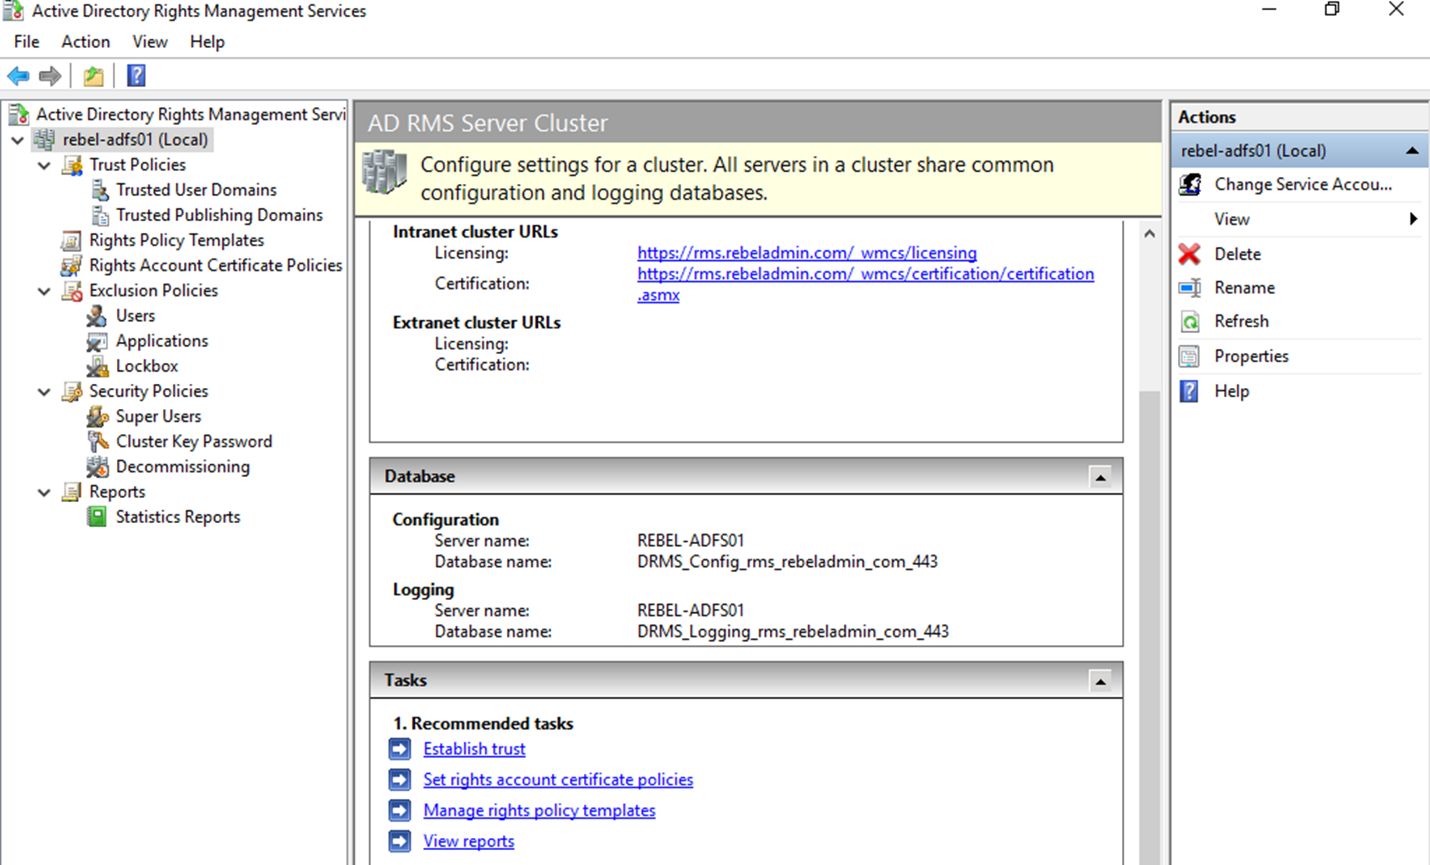
14) Once log back in, Go to Server Manager > Tools > Active Directory Rights Management Service to access the AD RMS cluster.
Test Protecting Data using AD RMS Cluster
Next step of the demo is to test the AD RMS cluster by protecting data. For that I am using two user accounts.